Once the X1E server-side components (Enterprise Manager, Collector Service, Load File Service, etc.) have been installed, we need to prepare a few configuration files to enable deployment of our data sources.
X1 Enterprise enables connection with a variety of data sources: individual user’s Windows or Macintosh desktops or laptops, network file servers, and Cloud sources (e.g., Dropbox, OneDrive). Using the Enterprise Manager (EM), the Administrator can deploy the X1E Client to individual machines, mount network shares and Cloud sources, and prompt indexing, querying, and collection of items from each of these data source types—all from a single, centralized web interface.
To connect with both endpoint client machines and network/cloud repositories, we will need to prepare two separate sets of configuration materials.
Preparing for Deployment of the X1E Client
To deploy the X1E Client, it is necessary to prepare the following three configuration files:
- Launcher Enrollment – this file will deploy with the lightweight X1E Launcher to install the necessary security certificates to establish a trust relationship between the client and the EM. After establishing connectivity, the Launcher will foster download and installation of the X1E Client.
- X1EConfig.xml - this file accompanies download of the X1E Client installer and specifies a range of settings to be applied to the application.
- Preconfigured Sources xml – this file is bundled with the X1EConfig.xml for download with the Client installer. It contains configuration instructions for the Files and Email connectors, specifying the parameters of data to be indexed.
X1E Configuration Editor
Preparation of both the Launcher Enrollment and X1EConfig.xml files are performed with a utility labeled, X1EConfigEditor.exe. You can find this utility within the X1 Enterprise Manager program files directory (default location - C:\Program Files\X1 Enterprise Manager). Double-click the executable to launch the menu interface.
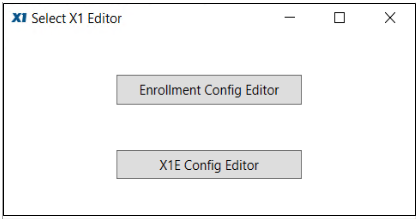
Enrollment Config Editor
Let us start with preparation of the Launcher Enrollment file. Click the button labeled, “Enrollment Config Editor” to open the Enrollment Config Editor panel.
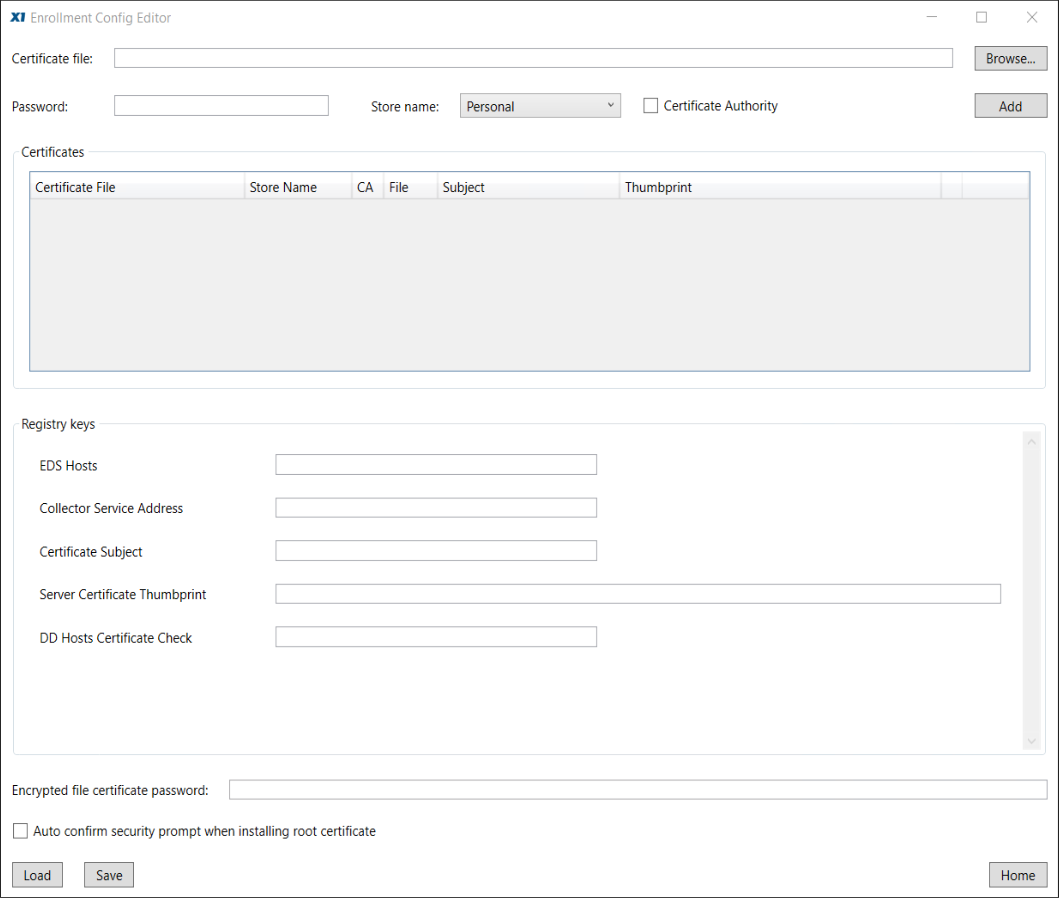
This panel is divided into three areas:
- Certificates
- Registry keys
- Encrypted file certificate password
Certificates
Here is where the Administrator specifies the security certificates that will be deployed with the Launcher to end node machines. You may recall during initial installation of the EM and Collector Service when we used the X1 Enterprise Service Configuration utility to generate and bind certificates to the services (e.g., Search Service, Tomcat Service, Collector Service). We will now bundle these same certificates with the Enrollment file for deployment to our X1E Client target machines. Installation of these security certificates on the client system will establish a secure trust relationship between the client and the EM.
Upon generating certificates in the Service Config utility, copies are exported to the following directory:
C:\Program Files\ X1 Enterprise Service Configuration\Export
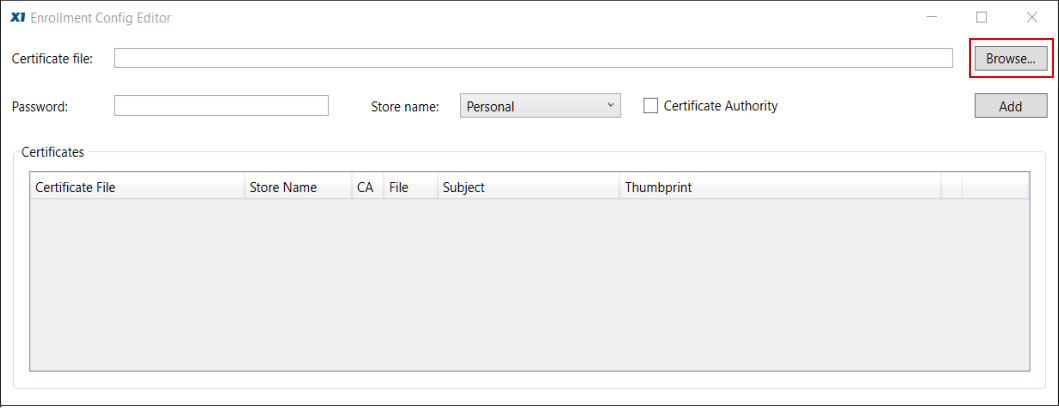
In order to bundle the certificates with the Enrollment file, we will need to add each certificate to this panel. Click the Browse button and navigate to the Export directory mentioned above. Here, you will find a folder labeled with the thumbprint of the server certificate. Open this folder to find two subdirectories, one labeled, “Client;” the other labeled, “Server.”
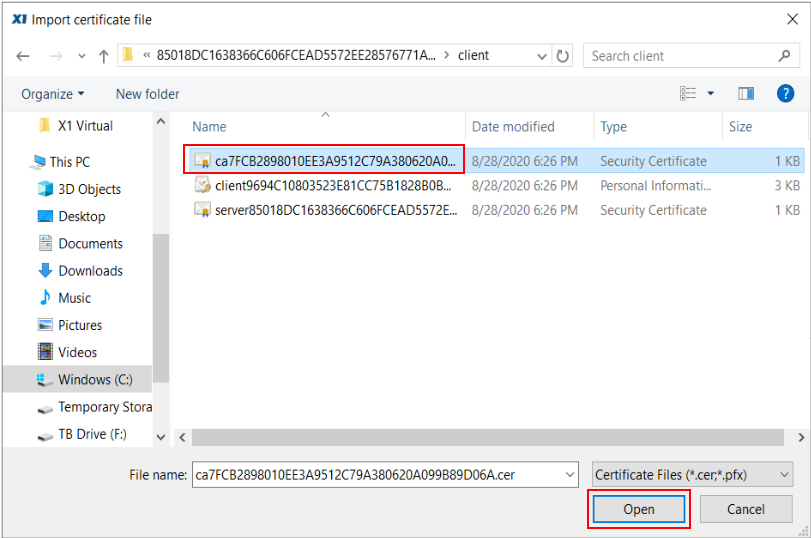
Open the Client directory to find three certificates: Certificate Authority cert, client pfx, and server cert. Select the Certificate Authority (CA) cert and click Open to add the certificate path to the panel and close the Browse window.
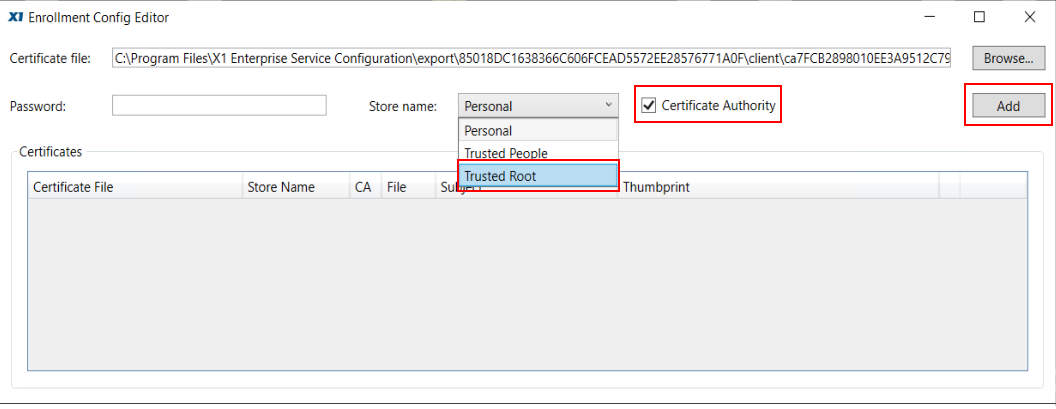
From the Enrollment Config Editor, click the Store Name pulldown and select the option ”Trusted Root.” Next, check the box labeled, ”Certificate Authority.” Finally, click the Add button to bundle the certificate with the Enrollment file.
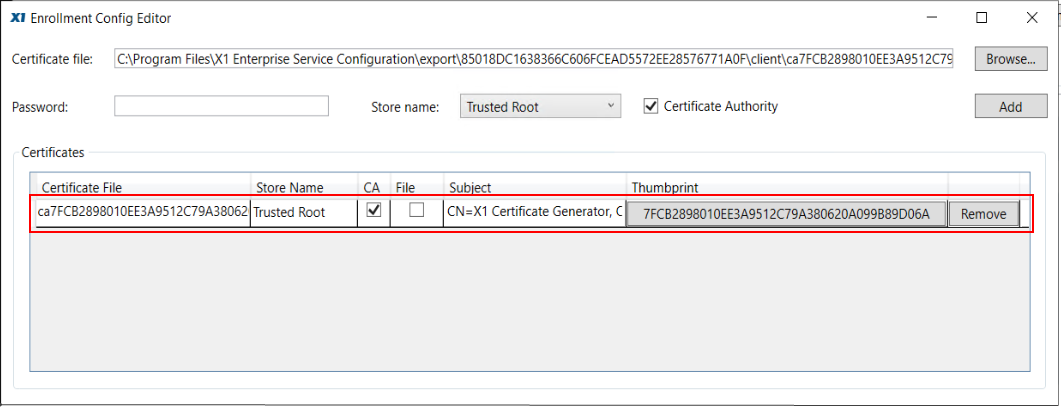
Repeat the Browse operation to add the Server certificate. Select “Trusted People” from the Store name pulldown and uncheck the Certificate Authority checkbox. If you set a password for the Server cert when you generated the certificates, enter it into the Password field, and click Add.
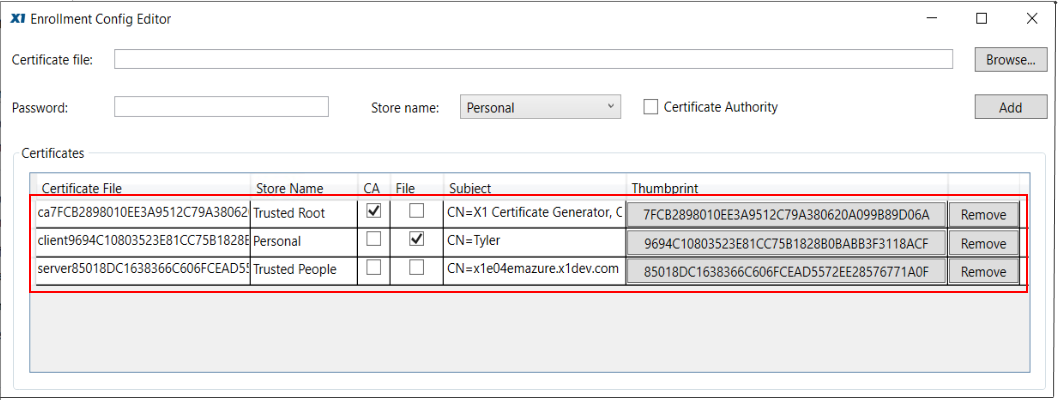
Again, click the Browse button to add the Client (pfx). Select “Personal” from the Store name pulldown, and if you set a password for the Client pfx when you generated the certs, enter it into the Password field. Click the Add button to complete bundling of the three certificates with the Enrollment file.
Registry Keys
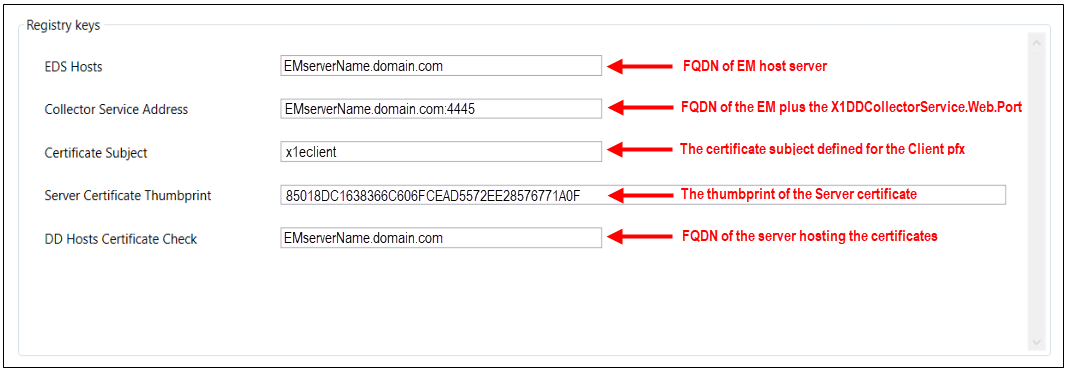
Let us shift focus to the Registry Keys section of the panel. Here we will find fields for the following five settings:
- EDS Hosts - populate this field with the fully qualified domain name of the EM host server
- Collector Service Address – again enter the FQDN of the EM host and append it with the port number designated for the X1DDCollectorService.Web.Port that you specified on the Collector Service tab in the Service Config Utility
- Certificate Subject - enter the subject specified when generating the Client certificate in the Service Config Utility
- Server Certificate Thumbprint - enter the thumbprint of the Server (Trusted People) certificate. To enter the value automatically, simply click on the gray Thumbprint field in the certificates grid near the top of the panel
- DD Hosts Certificate Check - populate this field with Subject of the Client pfx. Often, this is the fqdn of the Enterprise Manager host server
Encrypted file certificate password
Finally, let us look at the third section of the panel. Here, we will find two controls:
- Text field labeled, “Encrypted file certificate password”
- Checkbox labeled, “Auto confirm security prompt when installing root certificate”
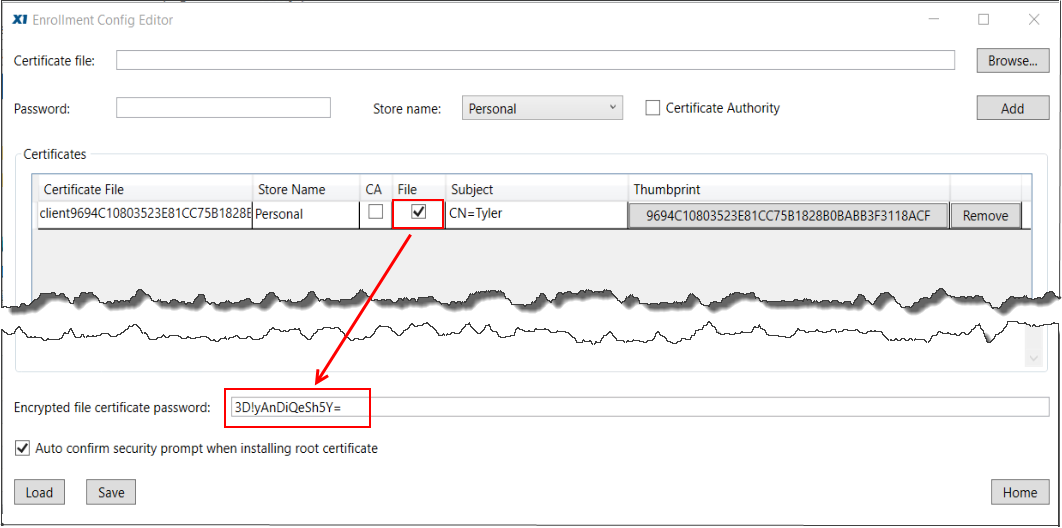
The “Encrypted file certificate password” field is populated when the “File” checkbox associated with the client certificate (in the Certificates portion of the panl above) is checked. Checking this box prompts for the client pfx to be stored as a file (default location for storage is the X1 Search data directory on the client machine), and to export to the client registry an encrypted copy of the pfx password. With this configuration, the encryted password will be applied to the pfx file upon launch of the client to establish the trust with the EM.
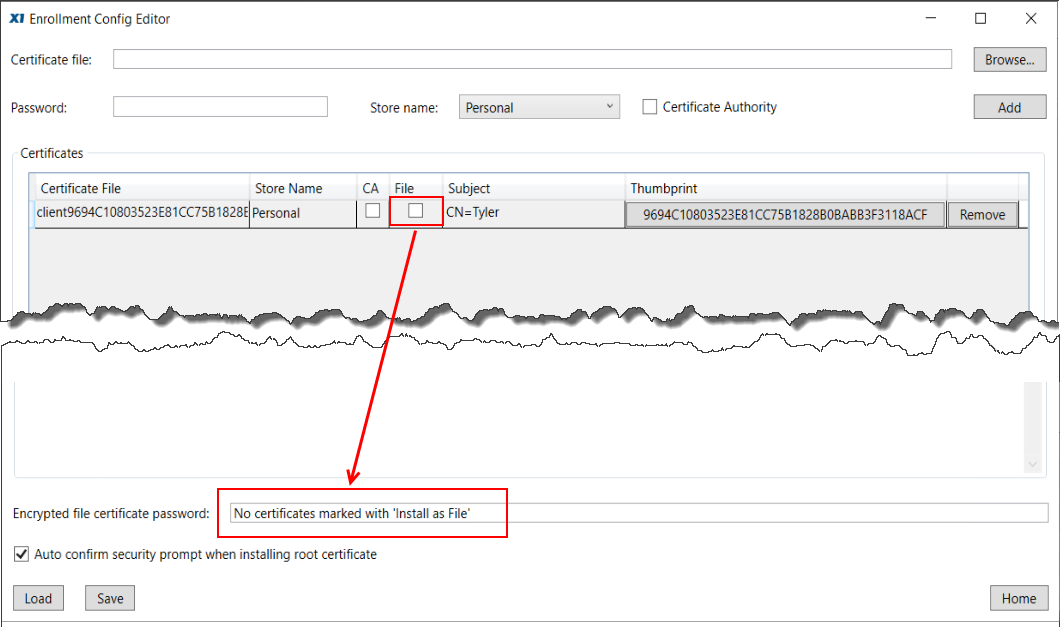
Alternatively, if the “File” checkbox for the Client certificate is left unchecked, the “Encrypted file certificate password” field will not be generated, nor deployed the registry of the client machine. In this configuration, the Client pfx will be imported into the certificate store of the client machine.
The purpose of the checkbox labeled, ”Auto confirm security prompt when installing root certificate” is to enable the Administrator to allow the CA certificate to be installed on the client machine, without need of involving the end user.
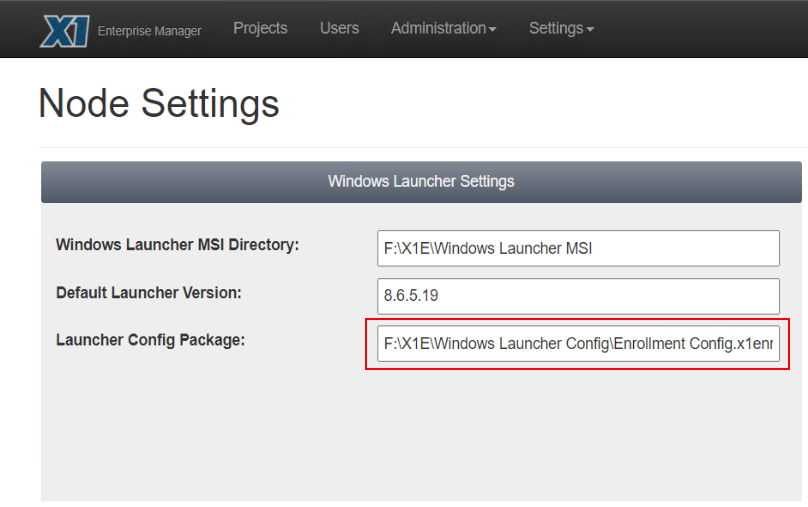
Once you have completed configuration of the Enrollment file, click the Save button. You will want to save the enrollment file to the location specified in the EM > Node Settings panel, for the Launcher Config Package. This will insure delivery of the file to the client at the time of deployment.
Next, we will review configuration of the X1EConfig.xml.